It’s easy to shop for gifts for the gardeners on our holiday list. There are always new tools available for the serious, and not so serious, gardeners in our lives. In fact, there may be too many to pick from, but we can help you narrow down the selection to find the perfect gift.
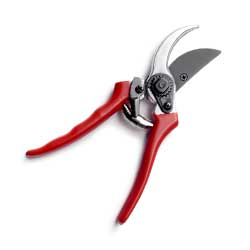
Pruners
Every gardener faces the need to prune or deadhead flowers at some time. From hand pruning a wayward twig to removing a branch 10′ overhead, there is a pruning tool to make any job easier.Because everyone’s hands and hand strengths are different (and some folks are left-handed), hand pruners are the most personal of garden tools. Two well-known companies, Corona and Felco, produce hand pruners and saws. Hand pruners come in two basic styles: by-pass pruners have two sharp blades that pass each other when cutting, while anvil pruners have one sharp blade cutting the material against the other flat blade. Both companies offer several models of these styles to accommodate different pruning needs, sizes of hands, hand strengths and orientations. New ergonomic models optimize hand strength and minimize discomfort.Another option is a pruning saw, which is different from any old saw. A larger sheath model saw makes short work of removing a large branch. A smaller fold-up model is great to have in a gardener’s pocket while making the daily rounds. Different models, with different lengths and teeth sizes, ease sawing effort. Check out our gift shop to see all the options.When an overhead branch requires removal, a gardener appreciates a pole pruner. Not only is it a hassle to get out the ladder, it’s dangerous to perform the sawing and pruning motions when balancing. The redesigned Fiskars pole pruners are powerful, with a telescoping pole to 12′ extension. If the branch is too large for the pruner, the detachable saw blade cuts through it. Unlike the old style pole pruners, there are no ropes to pull (and tangle in the tree!). Pruning heads even swivel to get a closer and cleaner cut. The Fiskars pole pruner, or Pruning Stik®, won’t fit in your gardener’s stocking, but it’s certain to be a winner!
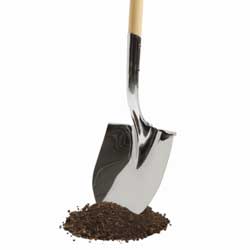
Shovels and Spades
Shovels and spades are other key gardening tools. While many shovel versions exist, the round point shovel is the most common. The heavy-duty blade point pushes through the soil and the rounded blade scoops the soil. Square-edged shovels also scoop soil and other materials in addition to digging but don’t have the point. Spades, basically a smaller version of a shovel, are usually flatter. Most shovels have a rolled lip, or rim, on the top of the blade. This is where the user puts their foot to push the tool into the soil. The larger the rim, the more comfortable for the foot when doing a lot of digging.Better quality shovels and spades are powder coated to prevent rust, are pre-sharpened, and the blade is welded or forged to the shaft. Shafts vary in style and material. Wood, plastic or fiberglass shafts may be straight or end with a handle. A fiberglass shaft lasts longer than wooden shafts and doesn’t require annual maintenance and cleaning. Ergonomic designs reduce the chance of wrist injury. Other shovel/spade specialties include the trenching shovels to dig deeper than the standard 12 inches, border spades and smaller sized round point shovels to dig smaller holes or working around existing landscape. And don’t forget trowels and other hand digging tools. If your gardener has a special digging or scooping need, there’s a shovel or spade for it.
Hoes
Hoes may seem old-fashioned, but there are new designs every gardener can appreciate. Used since ancient times, the hoe performs many functions in the garden depending upon its configuration. The regular hoe’s rectangular shaped blade, positioned at a right angle to the shaft, weeds and shallowly cultivates. The V-shaped version, also called the Warren hoe, has a point to dig furrows for seed planting. The other side closes the furrows after planting. The “weeding” and “action” style hoes make short work of removing weeds.
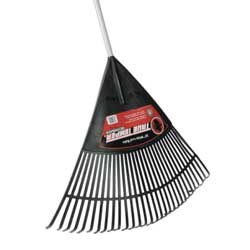
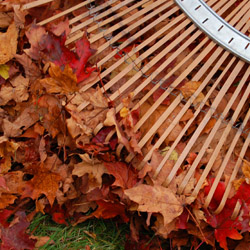
Rakes
A rake is another essential tool. Think of a leaf rake as a large hand – it allows the user to gather a large amount of material such as leaves and debris. Rakes may be metal or plastic, quite large to cover a large area quickly or quite small to get under plants without damage. Rakes are practical and save time and energy. Specialized rakes include the two styles of garden rakes, flat and bow, and thatch rakes to remove thatch from lawns to keep turf lush and thick.
There’s just one problem with giving these larger tools as gifts – they’re very difficult to wrap!