Monthly Archives: November 2024

Bring on the Bulbs for Better Home Value

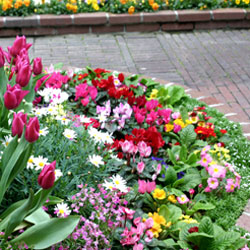
Many homeowners, whether they just purchased their home or have owned it for years, are interested in increasing the value of their property. A better value leads to greater home equity, a higher resale price and the personal pride of owning a lovely home. Good landscaping can lead to a better home value, and there’s no easier way to improve landscaping than with beautiful bulbs.

How Landscaping Adds Value to Your Home

A well-groomed, thoughtfully planned and attractively maintained landscape is a great asset to your home. Your home’s exterior, including its landscaping, is the first impression visitors see, and good landscaping creates an attractive, welcoming atmosphere. Colorful landscaping can help attract notice to your property, while larger plantings provide shade and help with temperature control. Borders can conceal fences or unsightly foundations, and flowerbeds soften the edges of the house structure to provide an appealing sense of nature. Unlike interior home improvements that come and go with the latest design trends, good landscaping is a constant asset to your property and your home value.

Why Bulbs Are Best

Bulbs are some of the best options to improve your home’s landscaping and increase your home value. While bulbs won’t grow to provide shade to your yard and don’t yield tasty treats in a garden, they have many benefits that add solid value and enjoyment to any yard.

  • Bulbs Are Familiar
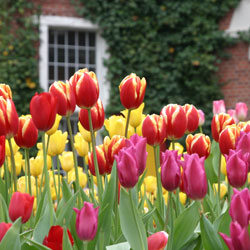
    Unlike exotic tropical plants or little-known cultivars of tree and shrubs, many bulbs are instantly recognizable. That familiarity is comfortable and reassuring, and adds a sense of peace to your landscaping. Tulips, daffodils, hyacinths, crocuses and lilies are some of the most popular and tried-and-true bulbs that can enhance your landscaping.
  • Bulbs Are Versatile
    While many plants can serve only one distinct purpose, bulbs can serve many purposes. Taller varieties can provide an effective screen for privacy or create stunning borders. Dense bulb patches can “paint” your landscape with flowing color, or bulbs can be layered in pots or containers for instant beauty. Bulb flowerbeds can be positioned along your home’s foundation, around trees or lining walkways, driveways or sidewalks. Bulbs can be strategically positioned to fill in thinner areas in your yard or landscaped beds as well.
  • Bulbs Are Beautiful In Different Seasons
    While a spring-blooming annual or a brilliant fall foliage tree may look stunning for one season, many bulbs offer beauty for far longer. Not only are their flowers showstopping beauties, but many bulbs have thick, graceful foliage that is delightful long after blooms may have faded. Furthermore, you can mix-and-match bulbs to keep a bed blooming from early spring to late fall without difficulty.
  • Bulbs Are Perennials
    Annual flowers are gorgeous but need to be replaced every year, a process that can be very time-consuming and labor-intensive. Bulbs, on the other hand, are perennials that will keep coming back year after year with very little extra care. With just basic maintenance – watering and the occasional removal of dead foliage – bulbs will grow back more lush and vibrant each year, continuing to add value to your home.
  • Bulbs Are Easy
    There’s no denying that bulbs are easy to grow and require very little maintenance to look their best. Bulbs can tolerate a wide range of soil types, pH levels and sunlight levels, and they often thrive even when neglected. This makes them an easy addition to any landscape, bringing their proven value to your yard quickly.

Improving Your Landscaping With Bulbs

It’s easy to improve your home’s value by adding bulbs. Simply choose the types and colors of bulbs you want, and you’re just three steps away from a beautiful landscape and a more appealing home.

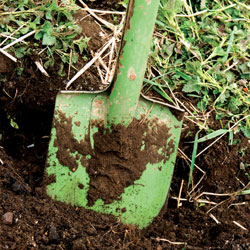
  1. Dig – Dig the appropriate hole to plant your bulbs, paying attention to the recommended depth for the bulb type. You can dig individual holes for each bulb, or plant an entire bed at once.
  2. Drop – Drop the bulbs in the holes. You can position them in graceful, cultivated rows, or choose a more organic, natural look. Cover the bulbs firmly with soil and a layer of mulch if desired.
  3. Done! You only need to keep a simple eye on moisture levels and the occasional critter that may enjoy a bulb snack, and you’re done with bulb care and maintenance. Before long, both your bulbs and your home value will be blooming!

With so many benefits from landscaping and the ease of bulbs to create a stunning look, why not add to your home’s value today? Get digging – you’ll be done before you know it!
Better Value Bulbs #1

Better Value Bulbs #2

Better Value Bulbs #3

All About Amaryllis

A bold, flowering bulb, amaryllis is popular for its winter blooming habit and makes a colorful indoor plant as well as a great gift for anyone with a green thumb. But how much do you really know about these familiar flowers?

What Is Amaryllis?

These plants are part of the flowering bulb genus Hippeastrum, which is native to South America, Central America, Mexico and the Caribbean in tropical and subtropical regions. It must be noted that the familiar amaryllis can easily be confused with the genus Amaryllis, which is actually native to southern Africa and is most successful only when grown outdoors. Hippeastrum flowers, on the other hand, thrive indoors and are widely sold as gifts and houseplants in the winter months.

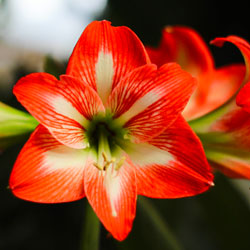
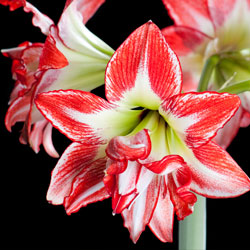
Hippeastrum bulbs range from 2-5 inches in diameter and are relatively fleshy. Each bulb will produce several spear-like, stiff leaves that can reach 12-20 inches long. Along with the foliage, each bulb can produce 1-2 long stems that will yield 2-12 trumpet-shaped flowers with large, triangular petals. The bloom colors range from white, red, orange, salmon, pink and peach to deeper hues of burgundy and purple. Variegated and striped blooms are also popular.

Blooms may last for several weeks, and the foliage can persist long after the blooms die.

Potting and Caring for Amaryllis

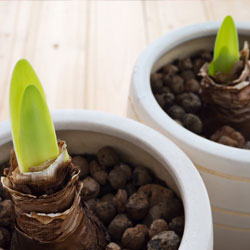
Unpotted, dormant bulbs should be stored in a cool (55 degrees Fahrenheit), dark, dry location. Before planting, the bulbs should be brought to room temperature, and the roots can be lightly rehydrated in lukewarm water for an hour or two before planting, but the base of the bulb itself should be kept dry to minimize the risk of rot. While these bulbs will bloom in water – they’re often sold in clear, decorative vases with the roots reaching into water and pebbles used as a planting medium – they will do better when properly planted, which will also encourage reblooming.

The best pot for a single amaryllis bulb will be just an inch wider than the bulb’s diameter, or several bulbs can be planted together in a larger pot for a more dramatic display. Because these flowers grow so tall, however, the pot should be heavy enough to support their size. If necessary, adding several rocks or a layer of gravel to the bottom of the pot before planting will help balance the weight to keep the arrangement stable, and a deeper pot will also provide adequate room for root growth. It may also be necessary to add a stake to support the tall flower stems, but be sure not to damage the bulb when adding a stake to the pot.

Rich potting soil is essential for the best amaryllis blooms, as these bulbs grow vigorously and require adequate nutrition to reach their full potential. When planting a bulb, it should be submerged in the soil up to its neck, but leaving the top quarter of the bulb uncovered. The soil should be tamped firmly to support the bulb. Place the pot in a warm, sunny spot when foliage emerges, and rotate the pot daily as the plant grows taller to ensure straight, upright growth that will better support heavy flowers.

Gently water the bulb until the first stems appear, but take care not to overwater the pot or the bulb and roots may rot. As the plant grows taller and the blooms emerge, more watering will be needed to keep it adequately moisturized.

It may take 7-12 weeks for an amaryllis to bloom, depending on the type and size of bulb, its growing conditions and the care it receives. Larger bulbs that produce more flowers will generally take longer to bloom, while smaller bulbs will have shorter flowers but will bloom more quickly.

After the Bloom

Because these plants are popular every holiday season, many people discard amaryllis bulbs after they have stopped blooming. It is possible, however, to encourage reblooming with the proper care.

After the flowers have faded, deadhead the blooms but leave the foliage intact. Sharp flower-pruning shears are best to avoid tearing the stem or causing it to bend or break. Your Amaryllis should be placed in the sunniest spot available, continue to water as necessary and monthly feeding should ensue. This will encourage leaf production which with photosynthesize adding nourishment to the bulb enabling it to produce flowers again next winter. Move the plant outside once all danger of frost has passed to a sunny location. Continue to water and begin fertilizing every other week.

If you want to control when your amaryllis blooms again, you will need to encourage the bulb to go dormant. This is done by stopping fertilization, allowing the soil to gradually dry out, and reducing sunlight and temperature so leaf production slows and eventually stops. The dormant period will generally last 8-10 weeks, so, if you would like your Amaryllis to bloom for Christmas, mid-August is the time to begin this process. When leaves brown naturally, cut them back, remove the bulb from the dry soil, wrap it in newspaper and store it at around 55 degrees Fahrenheit for 8 to 10 weeks. After this dormant period, repot the bulb in fresh soil and begin watering again. The bulb will start to produce leaves and flowers won’t be far behind. With the proper conditions and care, you can keep your amaryllis blooming for years to come.

Amaryllis flowers are attractive and bold, perfect for brightening any indoor landscape during a cold and dreary winter. By understanding these flowers and their needs, you can provide them with proper care to ensure they always look their best.


Winter Pond Prep Checklist

Your pond can be an attractive and valuable focal point of your landscaping, but it can also be a delicate one. As winter approaches, certain steps should be taken to ensure plant and fish survival so your pond will still be at its best next spring.

  1. Clean Out Debris
    Use a netted scooper, a rake, your hands and, if possible, a pond vacuum to clean out pond debris. Rotting vegetation produces gas under winter ice that can be fatal to fish, frogs or other aquatic wildlife. This is also a good time to reduce any mud coverage over the pond’s bottom.
  2. Trim Pond Plants
    Trim and move hardy pond plants to the deep end of the pond (minimum 18” depth) to prevent them from freezing. Cut their vegetative growth back to about one inch above the soil line. Extra foliage will be more delicate and could rot over the winter. Especially be sure to trim any foliage that is already broken, wilting or damaged.
  3. Remove Tropical Plants
    Tropical plants or any delicate vegetation should be removed from the pond and placed in a basement or garage where they will not freeze. Keep plants moist throughout the fall and winter months until it is time to return them to the pond.
  4. Disassemble Summer Equipment
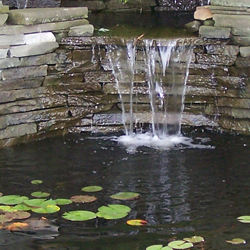
    Remove and clean the pond pump and waterfall or fountain feature (if applicable). Store them inside for the winter. See your maintenance guidelines for proper storage recommendations to keep the equipment in peak condition.
  5. Clean Pond Filter
    Thoroughly clean the pond filter and inspect it for any damage. If necessary, repair or replace the filter.
  6. Change Fish Diet
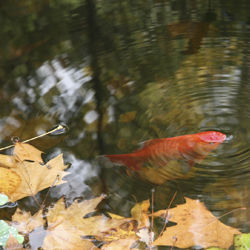
    Feed fish with spring/autumn food mixtures to provide good nutrition for their slowing metabolism. Stop feeding them completely when temperatures drop consistently below 50 degrees Fahrenheit. Avoid overfeeding, which would contribute to excess debris and decay in the pond over the winter.
  7. Set Up Pond Heater
    If needed, set up your pond heater for winter use. Test the equipment to be sure it is functioning properly and make any repairs or adjustments as needed.
  8. Cover the Pond
    Cover your pond with netting, screening or a shade cloth to minimize debris that will fall into the water throughout the winter. Secure the perimeter with sod staples or rocks to prevent the covering from blowing away. This will make spring cleanup and restarting your pond much easier.
  9. Relax until spring!
    Your pond will be ready for warmer temperatures when you are.

Pond Prep #1

Pond Prep #1

Freshen Up for Fall

Transform summer garden pots, planters and window boxes into magical displays this fall. The addition of mums, winter pansies and ornamental cabbage and kale are always excellent choices but you can really spice things up with the inclusion of a few of these colorful, cold-hardy selections. Which ones will look best for your autumn landscape?

  • Acorus gramineus ‘Ogon’
    This graceful, fan-shaped acorus variety is ideal for adding height to plantings. It keeps its color and shape into the winter for visual interest as other plants lose their vibrancy.
  • Acorus gramineus ‘Variegatus’
    This is the white-variegated version of ‘Ogon’. Its white-green striping is the perfect complement to mixed planting in silver, pink, purple or blue, and its lightness adds freshness to the arrangement.
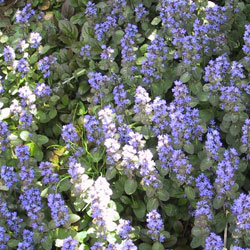
  • Ajuga reptans ‘Burgundy Glow’
    This ajuga has a trailing habit and pretty, variegated leaves. Its blue flowers are scattered in fall and summer but this plant blooms profusely in springtime.
  • Ajuga reptans ‘Mahogany’
    The rich mahogany color of the shiny, short-stemmed leaves turns darker and more lustrous in the winter, ideal in a frosted or snowy landscape. Pretty bright blue flowers punctuate this creeper, mostly in the spring.
  • Ceratostigma plumbaginoides ‘Leadwort’
    The prolific flowers of this plumbago are an intense gentian-blue and the foliage turns bright red in low temperatures, adding visual heat to the landscape even on cold days.
  • Euphorbia amydaloides ‘Purpurea’
    This pretty perennial is exceptionally frost resistant. ‘Purpurea’ features upright branches with leaves that form a rosette pattern and turn from reddish to purple in the cold.
  • Helichrysum thianschanicum ‘Icicles’
    Here’s an easy, fast-growing helichrysum variety with striking, velvety-silver leaves and a compact growth habit.
  • Lamiastru galeobdolon ‘Herman’s Pride’
    ‘Herman’s Pride’ has serrated, shiny silver leaves with green venation and yellow flowers in the spring. The plant trails as it grows, making it perfect as an accent in hanging baskets, taller containers and window boxes.
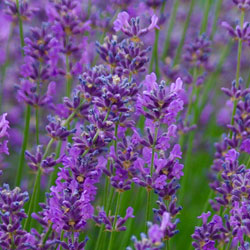
  • Lavendula lantata ‘Silver Leaf Lavender’
    This lavender variety has silvery-white leaves that are velvet-like to the touch and hold their color throughout the winter. Dark purple-blue flowers appear by the second year and contrast beautifully with the foliage.
  • Lysimachia nummularia ‘Goldilocks’
    Proven to do equally well in both sun and shade, ‘Goldilocks’ exhibits wonderful versatility. The golden foliage creeps and hangs in lush profusion of round, shiny leaves.
  • Salvia officinalis ‘Icterina’
    This sage has a glowing, golden-yellow variegated leaf. ‘Icterina’ maintains its shape and holds its color long into the winter.
  • Salvia officinalis ‘Purpurascens’
    The eggplant-colored leaves of this sage warm up any planting. Try it as a culinary herb as well and enjoy the subtle taste.
  • Salvia officinalis ‘Tricolor’
    ‘Tricolor’ offers a unique combination of purple leaves with white borders that turn pink when temperatures drop.

No matter which of these plants you opt for, you’ll enjoy the rich colors and variation they bring to your autumn plantings.

freshen-1

freshen-2

Problems With Your Compost Pile? Fix Them!

A compost pile should be part of every gardener’s yard, since it adds so many benefits for recycling and providing organic material in the garden. There are times, however, when it can be tricky to keep a compost pile in peak condition and breaking down material most efficiently. If you encounter any of these common problems, you can easily correct them and keep your compost pile at its best.

  • Pile is Too Dry
    Without adequate moisture, beneficial microorganisms cease to function and decomposition stops, turning a compost pile into a clumpy mess that does not decay into usable organic material. Keep the pile moist at all times, but not overly wet. A dampness like a squeezed sponge is ideal. It may be necessary to use a hose to water your pile occasionally, or a tarp or piece of plastic over the top of the pile can help keep moisture in the pile instead of evaporating.
  • Foul Odor
    A stinky compost pile is no gardener’s friend, and over-watering the pile will compact the material. When air space is decreased, the pile becomes anaerobic, resulting in an unpleasant odor. Turn the pile frequently to increase aeration and add larger pieces of dry, porous, carbon-rich material such as wood chips or straw to absorb excess water and improve air circulation.
  • Pile is Cool
    Check all the items required for a hot, quickly-decomposing pile: carbon, nitrogen, air and water. Correct any deficiencies. Another issue may be that a pile that is too small will have difficulty insulating itself. Increase the size of your compost pile by adding more material so it can generate sufficient heat from decomposition to keep itself warm.
  • Pests in the Pile
    While insects and worms are welcome helpers in a compost pile, a poor pile may also be attracting mice, rats, squirrels, raccoons and other wildlife. This usually means that the wrong material was used for composting. Never add meat, fish, bones, dairy products or oily food to the compost pile, all of which can have strong odors that will attract unwanted wildlife. Similarly, no human, cat or dog manure should be added to the pile. Avoid adding weed plants or diseased plants as well, since those weed seeds or disease spores could be transmitted to your garden or landscape when the compost is spread.
  • Poor C/N Ratio
    When planning the optimum conditions for compost decomposition, the standard recommendation is 3-to-1; three parts carbon to one part nitrogen. Carbon-based material is brown and nitrogen-based material is usually, but not always, green. Chopping or shredding additions to the compost pile will speed up the decomposition and help keep the pile balanced.

    The best materials to add to your compost pile include…

    Brown Material (Carbon-Based)
    – Dried, dead Leaves
    – Shredded paper, including newspaper
    – Wood ash
    – Sawdust
    – Eggshells
    – Chipped brush and wood chips
    – Straw and twigs

    Green Material (Nitrogen)
    – Grass clippings and sod scraps
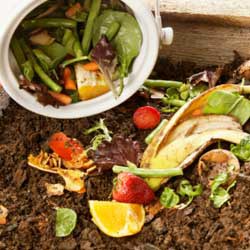
    – Vegetable and fruit peels, scraps and rinds
    – Disease and insect-free plant material, such as clippings and prunings
    – Horse, cow, chicken and rabbit manure (herbivores)
    – Coffee grounds and used coffee filters
    – Used tea bags
    – Used potting soil

No matter what issues your compost pile may be having, problems are easy to correct and you can quickly adjust your pile to be productive and efficient. Before you know it, you’ll have plenty of rich, nutritious compost to nurture your garden and landscape all year long.

compost-1

compost-3

compost-2

Bird Feeding Basics

Winter is the perfect time to think about attracting bird visitors to your yard. Bird watching is a great hobby that can be enjoyed by both younger and older members of the family and getting started is both easy and inexpensive.

Bird Feeders

The type of bird feeders you select will depend on where you want to observe your feathered friends, as well as the kinds of foods you are offering and the types of birds you want to attract.

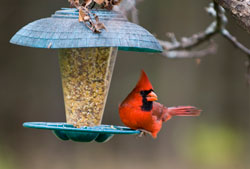
Hanging feeders, suitable for smaller birds, can be hung from a tree, pole or hook. Platform feeders can be mounted on a pole/post, deck railing or fence, or even just set on the ground. There are also window feeders that can be mounted directly to a window for enjoyment close at hand plus suet feeders or cages which hold suet cakes – a must for attracting insect-eating woodpeckers and nuthatches.

Feeders should be located in a sheltered place where they are not exposed to strong winds or vulnerable to attack from predators such as hawks and cats. Try grouping several different feeders together to attract the maximum number of different birds. All feeders should be kept clean and in good repair.

Bird Seeds

Just like us, birds have certain food preferences. Black oil sunflower seed is one of the most popular seeds, attracting a large variety of different birds. Some seeds such as Nyjer (thistle) are very specific – if you want to attract colorful goldfinches, then this one is for you. Mixes containing sunflower, thistle, cracked corn, millet and other seeds are also available, to tempt many bird visitors. Larger birds that feed on the ground, such as doves, quail and wild turkeys, will love cracked corn.

Natural Food Sources

If you are serious about attracting birds to your yard throughout the year, then think about planting trees, shrubs, perennials and even annuals that will provide natural foods at different times. Birds love berry-producers such as crabapples, hollies, hawthorns and viburnums. Perennial favorites for seed eaters include members of the black-eyed susan family (Rudbeckia), coneflowers (Echinacea), goldenrod (Solidago) and coreopsis. Seed heads of ornamental grasses are also highly sought after. Of the annuals, sunflower (of course!), marigolds and cosmos are popular. Just be sure to leave seed heads on the plants so birds can take advantage of them.

Don’t Forget Water!

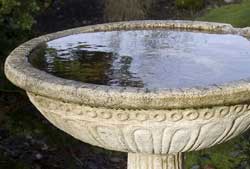
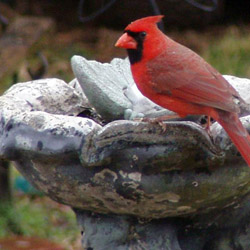
Water for bathing and drinking is one of the basic requirements for all birds, even for species that won’t visit feeders. If you already have a bird bath, be sure to keep it filled with clear, fresh water. A bird bath heater will keep water available even during freezing weather. A mister, dripper or bubbler will move the water around and attract even more birds with sparkling splashes.

From feeders and seeds to plants and water sources, we have everything you need to get started attracting birds. Come on in today and you’ll be able to enjoy your feathered friends this fall and winter!

bird-feeding-1

bird-feeding-2

bird-feeding-3

Birdscaping

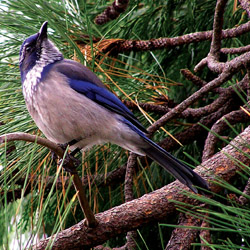
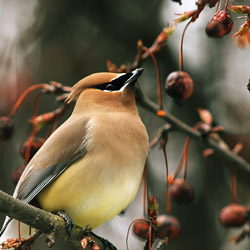
As wildlife habitats are threatened by development, the creation of a bird-friendly environment that provides food, water and shelter is crucial to the existence of our wild bird population. Caring for our feathered-friends is an educational and enjoyable activity for the entire family that brings beauty and song to our lives.

Benefits of Wild Birds

Birds are great guests to have in your yard, garden or landscape, and they provide more benefits than many homeowners and gardeners realize. Wild birds can…

  • Control insects by feasting on both flying and crawling insects, as well as spiders, slugs, snails and other creepy-crawlies.
  • Pollinate plants by flitting from flower to flower as they seek out insects or eat seeds, taking pollen along between blooms.
  • Manage weeds as they consume copious amounts of weed seeds before the seeds ever have a chance to sprout.
  • Control rodents when raptors visit the yard in search of mice, rats, gophers, voles or other unwanted pests.

Attracting Backyard Birds

Fortunately, it is easy to attract a wide variety of backyard birds when you offer them what they need most – food, water and shelter.

Food for Birds

Wild birds rely on both natural and supplemental food supplies so it is important to consider both when birdscaping. Feeding the birds is most important in the winter when natural food is scarcer, but they will visit feeders at any time of year. Migratory birds require additional food in the spring and fall as they pass through the region and nesting birds will utilize feeders in the summer.

Tips:

  • Provide a variety of natural foods for birds by planting berry bushes, seed-bearing flowers, nectar-rich flowers and sunflowers. Leave windfall fruit on the ground for birds to nibble. Minimize pesticide use so birds can feast on insects as well.
  • Add supplemental feeders to your yard, such as birdseed feeders, suet feeders and nectar feeders. Clean feeders weekly to avoid mold that can be dangerous to birds, and be sure feeders are full when birds need them most.

Water

Improve your backyard bird habitat by adding water. Birds require a constant supply of clean water for drinking and bathing. This is especially important in late summer, when water is scarce, and in the winter, when it is frequently frozen.

Tips:

  • Place bird baths in a protected location safe from predators, and keep the baths filled at all times so a fresh supply of water is constantly available.
  • Scrub off algae as soon as it is appears and thoroughly was the bird bath each week to minimize feces contamination or other messes in the water.
  • Provide motion for greater attraction by using a bubbler, wiggler, dripper or fountain. Birds will see the sparkles of the moving water and will hear the splashes from great distances, so more birds will visit.
  • Use Mosquito Dunks to safely prevent mosquito larvae in warm weather. A clean bird bath with moving water will also harbor fewer insects.
  • Add an outdoor-safe submersible heater to the bath in winter to keep the water liquid instead of frozen, or consider using a fully heated bird bath during the coldest months.

Shelter

It is important to offer safe and comfortable shelter for your wild birds to nurture their young, protect them from predators and shield them from the elements. Planting evergreen trees and shrubs and providing bird houses, along with roosting boxes and pockets, are all beneficial additions to your birdscape.

Tips:

  • Choose both deciduous and evergreen landscaping trees and shrubs to offer birds different types of shelter in all seasons.
  • Minimize pruning to give birds denser, more secure shelter to take advantage of when they feel threatened.
  • Plant in layers and create thicket-like pockets or corridors in your landscape so birds can move around freely without feeling exposed.
  • Supplement the shelter in your yard with good quality bird houses, winter roost boxes or nesting pockets to give birds even more options to stay safe and secure.

When you meet birds’ needs for food, water and shelter, your birdscape will soon be home to a fun and friendly flock of backyard birds.

Birdscaping_3

Birdscaping_1

Birdscaping_2

Audition Some Autumn Bloomers

Extend the beauty of your garden with vivid autumn-blooming perennials. When you think of fall-blooming plants, don’t stop at mums – there are many perennials that can add color to your yard at this time of year.

Top Autumn Bloomers

While there are different autumn-blooming perennials for different growing zones and climate conditions, some of the most popular and widespread options include…

  • Fall Daisies
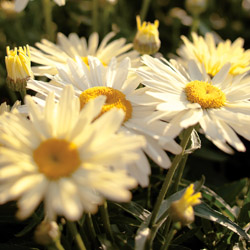
    For fall daisies (besides daisy mums!) grow Boltonia or Nippon Daisy. Boltonia is a tall (3-4′) grower, suitable as a background plant. White or pink daisies are borne in profusion atop fine grey-green foliage. The Nippon Daisy (Chrysanthemum nipponicum) is covered with large crisp white daisies in October. Both love lots of sun and make excellent cut flowers.
  • Autumn Sedums
    Bold-foliaged sedums provide texture as well as color in a sunny place. Sedum ‘Autumn Joy’ is the most well known. It has coppery-pink flower heads. Sedums ‘Brilliant’ and ‘Stardust’, with soft pink and white flowers respectively, are also attractive. For a totally different color combination plant sedum ‘Vera Jameson’. It has gray-purple foliage with rose pink blooms and looks stunning when planted with Blue Fescue, Artemesia Silver Mound and other silver-foliaged plants. As an added bonus, all the sedums are attractive to butterflies.
  • Autumn Asters
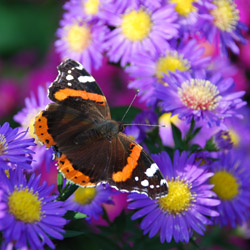
    Asters are another fall bloomer that butterflies love. These perennials like sun and moist, well-drained soil. There are many colorful aster varieties in shades of pink, purple, blue and white. Some favorites include tall-growing aster ‘Alma Potschke’ with bright pink flowers, blue-flowered aster ‘Professor Kippenburg’ and low-growing aster ‘Purple Dome’ with its deep purple blooms.
  • Autumn Goldenrod
    Sunny yellow goldenrod (Solidago) is another bright addition to the fall garden. Wrongly blamed as the cause of fall allergy problems, goldenrod has rightly taken its place in the fall garden. It looks particularly effective combined with blue flowering plumbago, purple asters and ornamental grasses.

Fall Bloomers for Shade Gardens

Even shade gardeners can enjoy late blooming perennials. Tall growing Japanese Anemones are a stately addition to the perennial garden. Bloom colors range from pure white to various shades of pink, and flowers can be single, semi-double or double blooms. Anemones grow well in light to moderate shade and spread quickly to form large clumps, filling in space vacated by spent summer plants. Turtlehead (Chelone) is another fast spreader for shade. Rose pink flowers cover the tops of the plant from early September to October. For a deeply shaded location, try Toad Lily (Tricyrtis), which has clusters of beautiful cream flowers, spotted with maroon along its upright stems. For light shade, plant Blue Cardinal Flower (Lobelia siphilitica), whose intense blue spikes can be admired from mid-August until frost.

No matter what type of garden you have, the end of summer does not need to mean the end of colorful blooms. Instead, just opt for amazing fall bloomers and enjoy brilliant color even longer!

Audition_3

Audition_1

Repotting Houseplants

Fall is an excellent time to repot many houseplants. Potted plants that have been growing outdoors during the summer have probably grown quite vigorously due to the high light levels and greater humidity. If the top growth of the plant has increased in size by 20 percent or more, it probably should be transplanted into a larger container so the roots can stretch and settle comfortably.

Before You Repot

Before repotting, check the plant and the soil carefully for insects.  Add systemic granules to the soil and spray the leaves with an insecticidal soap to remove any unwanted pests. If an insect infestation is particularly bad, it may be necessary to remove most of the plant’s soil and replace it with fresh potting soil. Avoid using soil from the garden, however, which will harbor insect larvae and eggs as well as weed seeds and other material you do not want in your houseplants.

Acclimating Plants

Bring your plants indoors well before any danger of frost for proper acclimation to the indoor environment. The change in light levels and humidity could shock more delicate plants, and they may wilt temporarily or drop leaves before they adjust to the new conditions. If possible, bring them in just a few minutes at a time for several days, gradually increasing their indoor time to several hours before keeping them indoors all the time. Flowering tropicals will also benefit from cutting back some of their foliage to avoid shock before being brought indoors.

To help houseplants overcome the transition from outdoors to indoors, position them in a bright, sunny area and consider adjusting indoor temperature and humidity controls to more closely mimic outdoor conditions. Make adjustments slowly and gradually, and the plants will adjust.

Time to Repot

Once your houseplants are adjusted to their indoor fall and winter environment, they can be safely repotted without adding to their stress. Repot the plants early in the day, and move them to a slightly larger pot. Avoid jumping several pot sizes, which could lead to excessive root growth while the foliage is neglected. Be sure to fertilize and water the plants appropriately to provide them proper nourishment as they settle into new pots. Do not expect luxuriant foliage growth right away, however, as it will take some time for the plants to begin growing again, especially in fall and winter when most houseplants are entering a dormant, slow growth period.

By repotting your houseplants in fall, you can help healthy, vigorously growing plants adjust to a new environment and continue their growth with ease in a new, larger, more comfortable pot.

Repotting_1

Over-Wintering Container Plants Outdoors

All containerized plants that are considered hardy in your zone can spend the winter outdoors, but you do need to take a little special care to keep them safe and comfortable as temperatures drop. Despite their hardiness, winter is still a challenging season, but it is possible to keep your container plants healthy until the days grow longer and warmer again.

Options to Overwinter Your Container Plants

  • In the late summer or fall, removed the plant from its container and plant it in the ground while the soil is still warm. Another method is to bury the pot, with the plant in it, in the garden and remove the pot following spring. Both of these methods will help insulate the root system, preventing it from freezing solid and killing the root system.
  • Place containerized plants in an unheated garage but along a heated wall. This is an excellent method for very large pots or porous pots that tend to break apart from the constant cycle of freezing and thawing, and so would not be very hardy if buried. For extra root protection and insulation, wrap the pots in plastic bubble wrap or wrap an old comforter or quilt around the pots.
  • Group pots together along the sunny side of your house or shed. If this area is windy, create a windscreen with stakes and burlap. Place bales of straw or hay around the perimeter of the grouping up against the pots to further protect plants from cold winds. Fill in areas between pots with mulch, shredded leaves, grass clippings or hay for insulation. Lay evergreen branches or place a layer of mulch on top of the pots for additional protection.
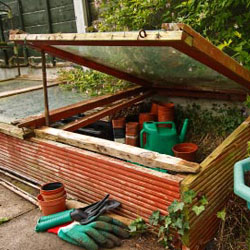
  • Use a cold frame covered with plastic or Reemay fabric to help control temperatures and reduce light as well, helping plants stay dormant in winter. It will still be necessary to use mulch, shredded leaves or hay around and in-between pots for insulation. Rodent control, such as Havahart traps, may be necessary when using this method.

Watering Container Plants in Winter

Make sure that plants go into the winter with moist soil so that there is water available to plant roots. Check soil moisture occasionally, never allowing it to dry completely. It is also a very good idea to spray needled and broadleaf evergreens with an anti-desiccant. This acts as a protective coating for plant foliage and stems as it helps them retain moisture.

With just a little care and forethought, you can easily prepare containers for winter without risking the plants and arrangements you have so carefully cultivated.

over-winter-2
over-winter-1